
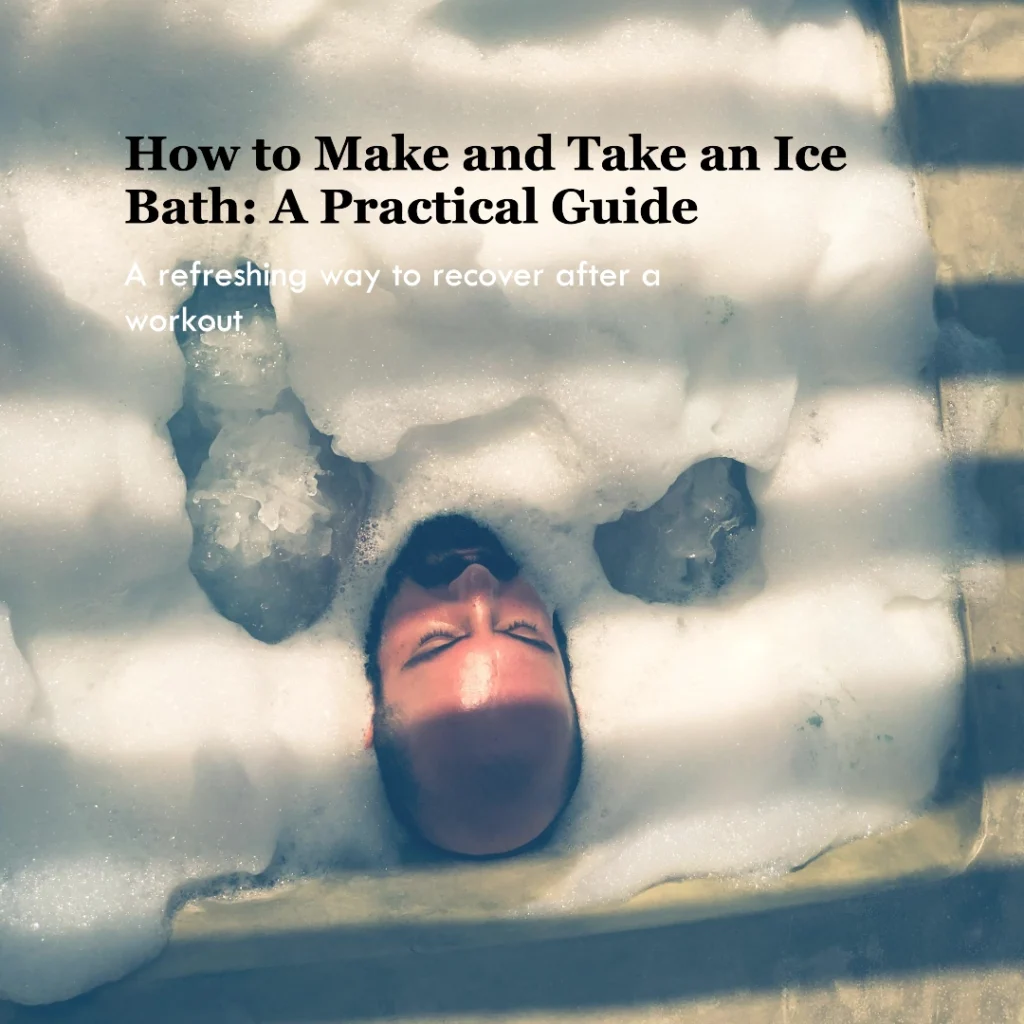
Are you an athlete or fitness fan eager to turbocharge your recovery after a challenging workout? Ice baths offer an exciting solution. They involve soaking your body in icy water – a rejuvenating practice. In our “How to Make and Take an Ice Bath: A Practical Guide” article, we’ll unveil the perks of this ancient wellness tradition and guide you in crafting your ice bath.
Whether you’re a pro athlete or seeking better well-being, this DIY method lets you embrace cold water therapy without fancy equipment. Join us as we dive into the world of ice baths, discover their benefits, and learn how to create your very own ice bath at home. Prepare for a journey that can change how you recover and feel after exercise!
What is An Ice Bath?
Discover the rejuvenating world of ice baths, a cornerstone of cold water immersion therapy. This practice, leveraging the chilling embrace of ice cold water, offers a natural method for alleviating muscle soreness and reducing inflammation. By prompting your blood vessels to constrict, ice baths facilitate a rapid decrease in swelling and expedite the recovery process, making them a favorite among athletes and fitness enthusiasts alike. Typically, these invigorating sessions last between 10 to 15 minutes, set in water temperatures ranging from a brisk 50 to 59°F (10 to 15°C), perfectly balancing the fine line between shock and therapy.
Whether standing or seated, the immersion challenges your body’s normal temperature range, introducing it to a novel environment ripe with potential physical and mental benefits. Beyond the physical relief, this cold plunge ventures into the realm of mental fortitude, testing and strengthening your resolve and stress management capabilities. Crafting this chilly sanctuary at home or exploring options at specialized clinics offers a versatile approach to integrating cold therapy into your wellness routine.
For those seeking a more dynamic recovery method or an edge in their wellness journey, ice baths present a compelling option. With each session, the body adapts, gradually fostering a resilience that transcends the confines of the tub. This form of cold plunging not only revitalizes fatigued muscles but also invigorates the spirit, setting the stage for enhanced performance and improved overall health.
Why Would You Want to Build Your Ice Bath?
Building your DIY bath at home extends beyond mere convenience; it unlocks a personalized avenue for enhanced home benefits and optimal cold therapy. Tailoring the experience to your personal comfort and recovery needs allows for a best experience, from controlling the water temperature to setting the duration that suits your body’s demands. The home benefits of constructing your ice bath are multifold, encompassing not just the physical perks like reduced inflammation and expedited muscle recovery but also significant strides in mental well-being, resilience, and stress management.
In the comfort of your home, you gain unrestricted access to this powerful recovery tool, enabling regular sessions that seamlessly integrate into your wellness routine. This convenience is not just about saving time and resources; it’s about fostering consistency in your recovery efforts, leading to sustained results and heightened well-being. The personalization aspect ensures that each plunge is attuned to your body’s thresholds and recovery needs, offering a tailored approach that commercial or public facilities cannot match.
Moreover, venturing into the DIY bath domain empowers you with knowledge and appreciation for the process, enhancing the overall experience. As you navigate the nuances of temperature regulation and session timing, you develop a deeper connection with your body’s responses and needs. This hands-on approach not only amplifies the physical benefits but also enriches the psychological gains, making cold plunging a holistic tool for health and recovery.
Ice bath Helps:
- Ease post-workout muscle pain.
- Tackle swelling and inflammation.
- Cool down when overheated.
- Manage weight and uplift mood.
But remember, ice baths aren’t for everyone, so consult a doctor and follow the safety tips:
- Start slow and monitor duration and frequency.
- Keep your head and chest out of the water.
- Use protective gear like gloves and socks.
- Have someone nearby in case of an emergency.
Ready to embrace the chill? Building your ice bath holds profound rewards.
The Benefits of Making an Ice Bath
Creating your ice bath unlocks numerous benefits:
- It activates brown fat, burning white fat for weight management.
- Exposure to cold boosts brown fat production, supercharging fat loss.
- Cold therapy renews brain synapses and releases dopamine and norepinephrine, battling depression and reducing inflammation linked to autoimmune diseases.
- Moreover, it sparks new mitochondria, elevating energy levels. Mitochondria are your cell’s energy makers.
- I researched that cold exposure delays Alzheimer’s onset and holds the potential for neurodegenerative conditions.
- Cryotherapy can even extend your lifespan by reversing shortened telomeres.
- If you deal with issues like Rheumatoid arthritis, fibromyalgia, or lower back pain, short cold sessions provide exceptional pain relief.
- Cold therapy bolsters the immune system against cancer and enhances overall immunity.
- Beyond health perks, expect rapid fat loss, sharper focus, a youthful feel, reduced depression, less inflammation, and lower stress.
- And forget costly cryogenic chambers; creating your ice bath at home is a practical and budget-friendly way to reap these rewards.
How to prepare for an ice bath?
Getting ready for an ice bath adventure? You might be wondering how long to stay in and how cold it gets. Well, here’s the scoop! Ice baths need some prep before you dive in.
- Mental preparation for taking an Ice bath: First, try a very cold shower to get your body and mind ready. Practice your breathing and see how you feel.
- Decide on the starting temperature: Think about how comfortable you are with cold. Starting around 60°F is totally fine; you can go colder later.
- Figure out how long you should stay in: For starters, dip your toes for 30 seconds to 1 minute, then gradually extend your icy escapade to 2 to 10 minutes.
- Learn a few breathing tricks: Breathing can help you handle the chill. Check our article for more on breathing techniques before, during, and after your ice bath.
What Equipment and Supplies Are Needed for an Ice Bath Experience?
Creating your ice bath adventure requires a few essentials:
- Container: Choose a sturdy, sizeable container to immerse your body, ensuring you can fully submerge yourself. Materials like plastic or fiberglass work well.
- Ice: Of course, you’ll need plenty of ice to lower the water temperature, providing those invigorating benefits.
- Thermometer: Ensure the perfect chill with a dependable waterproof thermometer. Aim to keep your ice bath temperature in the refreshing sweet spot of 50–60°F (10–15°C)
- Timer: Keep track of your time in the ice bath. Start with around 10 minutes and adjust based on your experience and comfort level.
- Towels: Towels are essential for cushioning, insulation, absorption, warmth, and post-bath drying and massages. Designate a specific towel for your ice bath routine for hygiene.
For a bathtub ice bath, you may need a hose if you’re not using a stand-alone tub with a faucet. A plunge tub streamlines water temperature adjustments. Make sure to have suitable clothing for your ice bath, like a T-shirt, shorts, or a bathing suit.
Consider adding a chair, step stool, non-slip mat, and post-plunge clothing for a smooth experience. For a straightforward setup, have a dedicated ice bath, ice, a thermometer, and towels. This is your gateway to a refreshing and invigorating ice bath experience at home.
Safety Precautions When Taking an Ice Bath
Safety is your guiding star when embarking on the exhilarating journey of ice baths. Here’s your straightforward guide to a secure chill:
- Gradual Temperature Adjustment: Start with 50–59°F (10–15°C) water. Ease in, add ice as you go, and embrace the wisdom of ancient civilizations that valued cold water for recovery.
- Monitor Your Time: Equip yourself with a timer. If you’re new, start with a modest 1-2 minutes, then progress to a refreshing 5–15 minutes. Be in tune with your body; if the cold becomes too much, exit promptly, and don’t forget to double-check the water temperature.
- Listen to your body: Start short; observe your breath and comfort. If you’re extremely uncomfortable, numb, dizzy, or struggling to breathe, exit. Your safety comes first.
Remember these safety rules:
- Avoid contraindications.
- Stay sober when plunging.
- Keep an eye on children.
- Always enter feet first.
- Don’t forget to breathe.
- Allow time to warm up afterward.
How to Make an Ice Bath?
Ready to dive into the world of ice baths and elevate your recovery? Our step-by-step guide has your back for setting up your ice bath:
Step 1: Find the Perfect Spot
Selecting the right location is the first step to a successful ice bath. Here’s how:
- Measure your space: Ensure it’s roomy enough for your ice bath container.
- Keep it cool: Choose a shaded area to maintain the ice bath’s temperature and avoid direct sunlight.
- Think convenience: Pick an easily accessible spot for your ice bath sessions.
- Safety first: Ensure the location is stable and can support your container.
- Privacy matters: If you prefer peace, find a spot that suits your privacy needs.
Step 2: Prep the Container
Your container should be clean, secure, and ready for action:
- Start with a good clean: Clear it of dirt and debris.
- Leak check: Examine for cracks or leaks and switch containers if necessary.
- Size matters: Select a container size that fits your space and needs.
- Stable platform: Position it on a level surface to prevent accidents.
- Optional lining: For easy cleanup, consider using a plastic liner or garbage bag.
Step 3: Fill with Ice and Water
Time to create that chilly environment:
- Gently add ice, distributing it evenly in the container.
- Use enough ice to reach your desired coldness level (the amount depends on your container’s size).
- Mix small and large ice cubes for uniform cooling.
- Pack the ice tightly to prevent quick melting.
- Top off with water, ensuring all ice is submerged.
- Let it sit for a moment to let the water settle and cover the ice cubes.
Step 4: Monitor the Temperature
Maintaining the right temperature is key to a successful ice bath:
- Use a reliable thermometer to track the water temperature.
- Check periodically to ensure it stays within your desired range.
- Adjust as needed by adding ice or warm water.
- Keep an eye on time and temperature throughout the session for effectiveness and safety.
- Be aware of temperature fluctuations to prevent discomfort or harm.
- For a safe and effective ice bath, listen to your body and exit when necessary.
What to Do Before, During, and After Your Ice Bath?
Here’s what you can expect during each stage of your ice bath experience:
Before You Take the Plunge:
- Get ready for the cold sensation and a potential rush of emotions.
- Stay cool, keep your breathing steady, and avoid deep breaths to maintain balance.
- Your experience will depend on your cold tolerance and the type of bath.
- Minimal clothing is ideal for safety and heightened sensory awareness.
- Some use ice baths to awaken and sharpen their senses.
While You’re in the Ice Bath:
- Cold water may trigger hyperventilation and a quicker heartbeat initially.
- These sensations tend to stabilize around the five-minute mark.
- Pay close attention to your body’s reactions.
- Shivering and initial discomfort are common experiences.
- If you can’t control your shivering or feel dizzy, it’s best to exit.
- Aim for an optimal duration of 10-15 minutes, gradually extending it.
- Minimize movement to reduce sensations.
After Your Ice Bath:
- Warm up with activities or a soothing hot shower post-ice bath.
- Avoid towels and warm clothing; allow your body to air dry for 5-10 minutes.
- Natural warming enhances benefits like improved mobility and pain relief.
- You’ll likely experience an uplift in mood due to elevated endorphin levels.
The Initial Challenge:
- It’s normal to feel some stress and anxiety just before your first ice bath.
- Focus on staying calm and maintaining regular breathing.
- The initial entry may seem daunting, but the shock eases after about a minute.
- Your body becomes less sensitive to the cold.
- Having a headrest or handle can make the experience more comfortable.
Why Should You Take an Ice Bath Without a Bathtub?
Who needs a boring old bathtub when you can plunge into the icy depths without it? Let’s uncover the magic of going tub-less for your ice bath. Say farewell to convention and hello to a world of cool relaxation without limits.
Easy Access:
- Big Containers: Grab a roomy bucket or a trusty plastic container, fill it with frigid water, and presto! Ice baths wherever you desire.
- Kiddie Pools or Inflatable Pools: These handy options are your ticket to a portable ice bath paradise. Backyard ice baths? You bet!
- Chilly Showers: No bathtub? No worries! Dial your shower down to arctic temperatures for an exhilarating cold shower.
- Ice Packs: If a bathtub eludes you, target specific areas with ice packs. It’s not your typical ice bath, but it brings similar benefits.
These accessible choices empower you to enjoy all the perks of ice baths without the need for a bathtub. Discover what suits you best and matches your unique needs.
Portability:
- Large Containers: Opt for a portable solution like a plastic bin or collapsible tub. They hold enough water for your ice bath and are a breeze to transport.
- Kiddie Pools or Inflatable Pools: Take your ice bath show on the road! These options are easy to move and set up, giving you the power to create your icy oasis wherever you roam.
- Cold Showers: If you’re lucky enough to have a cold shower, it becomes your passport to a portable ice bath. Just adjust the temperature, and you’re set for an instant chill.
- Ice Packs: When containers and showers are out of reach, don’t despair. Apply ice packs to target areas for a quick dose of cold therapy.
These portable methods allow you to relish the benefits of ice baths wherever you are, with no bathtub required.
How to Take an Ice Bath Without a Bathtub?
Want to dive into the refreshing world of ice baths but don’t have a bathtub? No worries! We’ve got some cool and simple ways for you to get that icy goodness.
Whether you’re up for a chill adventure in a giant container, a kiddie pool, a brisk cold shower, or with trusty ice packs, we’ve got your icy dreams covered. Here are the following steps so that you can learn about how to take an ice bath without a bathtub:
Take an Ice Bath Using a Large Container
For those without access to a traditional bathtub, a large container can serve as an excellent alternative for experiencing the invigorating effects of ice baths. This method is not only cost-effective but also adaptable to various spaces, whether you’re in an apartment or a backyard.
- Find a roomy container that can comfortably hold you.
- Fill it with cold water, leaving space for the ice.
- Add ice to your liking to create the desired chill factor.
- Ensure that the water is between 50 and 59°F (10 and 15°C) in temperature.
- Place your icy tub somewhere safe and close to your warm, fuzzy towels.
- Dip in, but don’t overstay your welcome (10-20 minutes).
- Keep an eye on your comfort level and exit with caution.
- Warm up with cozy clothes and a snug setting.
By using a large container, you can enjoy the magic of an ice bath, no tub needed! Just be careful and consult a pro if you’re unsure.
Take an Ice Bath Using a Kiddie Pool or Inflatable Pool
Utilizing a kiddie pool or an inflatable pool is a practical and enjoyable way to engage in cold therapy at home, especially during warmer months. These pools offer ample space and the flexibility to set up your cold plunging station indoors or outdoors, catering to personal preferences and space constraints.
- Take an inflatable or kiddie pool with you; they are very portable and simple to assemble. Pour cold water into it and add your ice cubes for more cooling.
- Fill it with cold water, then toss in your ice cubes for an extra chill.
- You can instantly have your very own tiny ice bath adventure by entering the ice bath.
- But never forget that consulting a healthcare provider is always a wise choice before making a decision!
Take an Ice Bath Using a Cold Shower
While not an exact substitute for full-body immersion, taking a cold shower can serve as a convenient and accessible form of cold therapy. This method is particularly suitable for those with limited space or resources, providing a quick and easy way to cool down and invigorate the body after long runs or intense workout splits.
- Select the coldest setting when you turn on the shower.
- Give the cold water five to ten minutes to do its job before starting at your feet and working your way up.
- Boost circulation with a little self-massage under the chilly stream.
- Gradually turn up the heat as you finish.
- A cold shower is a quick and convenient ice bath substitute. Keep an eye on your body’s response, though, and ease into it.
Take an Ice Bath Using Ice Packs
For targeted cold therapy when full-body immersion isn’t possible, using ice packs can be an effective alternative. This method allows you to concentrate the cooling effects on specific areas that may require attention due to muscle soreness or injury, providing a more localized approach to cold exposure.
- Get a bunch of ice packs ready.
- After adding the ice packs, fill a container with cool water.
- Make sure they’re spread evenly for consistent cooling.
- Test the water temperature; it should be chilly but not extreme.
- Step in and let your body adjust.
- Stay mindful of your comfort levels during the icy soak.
- Afterward, remove the ice packs, dry off, and warm up slowly.
Ice packs offer a portable and hassle-free way to get your ice bath fix. And as always, play it safe and consult a healthcare professional if needed.
How to Do an At-Home Ice Bath?
Creating an effective ice bath at home doesn’t require elaborate equipment or a professional setup. Instead, with some preparation and basic supplies, you can enjoy the many benefits of cold water immersion right in the comfort of your own space, perfect for workout recovery and alleviating muscle soreness.
Start by selecting a suitable container, such as a large bathtub, a sturdy storage bin, or an inflatable pool, that can accommodate your body and the volume of water needed. Fill the container with cold tap water, then gradually add ice until the water temperature drops to between 50–59°F (10–15°C). Use a thermometer to accurately measure the temperature, ensuring a safe and beneficial cold exposure level.
Before immersing yourself, set up your post-ice bath essentials, such as towels, warm clothing, and a hot beverage, to ensure a comfortable and gradual rewarming process. Limit your time in the ice bath to between 5 to 15 minutes, depending on your tolerance and experience level. Employ controlled breathing techniques to manage the initial shock and maintain calm throughout the immersion.
By following these steps, you can easily incorporate cold plunging into your recovery routine, enhancing your overall wellness and resilience right from home. An at-home ice bath offers a practical and effective way to harness the revitalizing power of cold therapy, improving your body’s recovery process and aiding in stress relief.
Energize Your Day and Boost Your Spirits with Ice Baths at Home
Starting your day with an ice bath can dramatically shift your energy levels and mood, setting a positive tone for the hours ahead. This invigorating form of cold therapy not only awakens your physical body but also stimulates mental alertness and emotional well-being. By incorporating morning ice baths into your routine, you tap into a natural source of energy, bypassing the need for caffeine or other stimulants.
The process of adapting to the cold water can significantly enhance your mental resilience. It teaches discipline and focus as you learn to control your breathing and reactions to discomfort. This daily practice of stepping out of your comfort zone has profound effects on stress management, fostering a sense of achievement and calmness that carries through the entire day.
Furthermore, the physiological benefits of ice baths, such as improved blood flow and reduced muscle soreness, contribute to a feeling of physical rejuvenation. The cold exposure aids in reducing inflammation, speeding up the workout recovery process, and boosting the immune system, leading to overall improved health and vitality.
Enhance Your Sleep: By chilling out before bedtime, you can kickstart melatonin production, the body’s natural sleep aid, promising you a night of profound slumber.
But before you take the icy plunge, consult your doctor, especially if health concerns like a heart condition are on your radar. Ensuring your safety is paramount.
How to Make an Ice Bath for Energy & Mental Health?
- Fill Your Tub with Cold Water: Top up your bathtub with cold water, but not to the brim, leaving space for ice and your body. No tub? No problem! Portable ice baths offer a solution that’s just as effective.
- Add Ice for the Ideal Chill: Toss in a handful of ice and gauge the temperature with a trusty thermometer. Aim for a refreshing 68°F (20°C) – a sweet spot that’s gentle on your skin.
- Unwind for 5 Minutes: Take the plunge for approximately 5 minutes, savoring deep, soothing breaths. Make yourself cozy and relaxed. Should unease or a racing heart strike, heed your body’s signals and exit the bath.
- Dabble in a Cold Shower: If a full ice bath doesn’t tickle your fancy, opt for a 1-3 minute cold shower to reap similar rewards. Begin with warm water and gracefully transition to a chilly cascade over 5 minutes.
- Make It a Daily Ritual: To keep your vitality and spirits at their peak, contemplate indulging in a morning ice bath or shower. For an extra pep in your step, consider a repeat session later in the day. Consistency is your ticket to unlocking the full potential of cold therapy.
Remember, cold therapy is a fantastic complement but not a replacement for professional assistance with anxiety or depression. Always seek the counsel of your healthcare provider before embarking on significant changes to your health regimen.
How to do an at-home ice bath to relax after working out?
After a strenuous workout, whether it’s intense long runs or demanding workout splits, your body needs effective recovery to repair and strengthen. An at-home ice bath can be a perfect solution to reduce muscle soreness and accelerate recovery, allowing you to relax and rejuvenate post-exercise.
To prepare for your post-workout ice bath, fill your chosen container or bathtub with cold water, then add ice to lower the temperature to between 50-59°F (10-15°C). Before immersing yourself, ensure you are hydrated and have not eaten immediately before the bath to avoid discomfort.
Gently lower yourself into the cold water, starting with your feet and gradually submerging up to your waist or chest, depending on your tolerance and the areas needing recovery. Focus on deep, calm breaths to ease the transition and maintain relaxation. Limit your time in the ice bath to between 5 to 10 minutes, particularly after a workout, to avoid overcooling and to maximize the recovery benefits.
After the bath, slowly exit the water and gently dry off, avoiding vigorous rubbing that can irritate cold skin. Dress in warm, comfortable clothing and consider doing light activities such as walking or stretching to aid blood flow and further relax your muscles. This post-ice bath routine helps your body to recover optimally while providing a moment of relaxation after the rigors of exercise.
How to Properly Soak After a Workout?
- Fill Your Tub with Cold Water: No need to fill it to the brim—halfway is perfect. Don’t have a tub? No problem! A kiddie pool, plastic tub, or portable ice bath works great.
- Get the Right Chill: Add three 5-pound bags of ice to reach a chilly 55-68°F. Use store-bought or homemade ice. Just double-check with a thermometer or your elbow.
- Pre-Ice Bath Shower: Rinse off with a quick, lukewarm shower to steer clear of sweat and germs. It’s all about preventing skin issues.
- Protect Sensitive Areas: Shorts and foot booties will keep your sensitive bits and feet warm and safe from the cold.
- Take It Slow: Start with your feet and gently ease the rest of your lower body into the icy water. Breathe deeply to stay calm and adjust to the cold.
- Maybe Dip Further: If you’re up for it, dip your upper body, but remember, it’s all about what feels right. No need to push yourself.
- Enjoy the Soak: Settle in, count breaths to distract from the cold, and set a timer for 5-10 minutes. If it gets too chilly, no worries. Hop out early.
After your ice bath, be cautious when stepping out to avoid slipping. Lay a towel on the ground to prevent any icy surprises. As you get used to ice baths, you can gradually extend your soak time, but remember—don’t overdo it. Excessive time in ice water can harm your skin and health.
How to Get Warm After Taking an Ice Bath?
Once you’ve conquered the icy waters, it’s time to cozy up and shake off the chill. Here’s your simple plan:
- Towel Time: As you emerge from your frosty soak, wrap yourself in a towel and gently pat your skin dry. Be thorough – you want to get rid of all that cold water. For an extra touch of comfort, grab a warm towel fresh from the dryer.
- Get Comfy: Once you’re dry, slip into some warm clothes like cozy sweats or a plush bathrobe. You can even snuggle up under a toasty blanket. If you’re still shivering, layer on more clothing for a speedier warm-up.
- Sip and Savor: Boost your body heat with a hot drink like coffee, tea, or soothing broth. Take small sips to avoid shocking your system with the temperature change. If you’re watching out for your heart, stick to decaf.
- Patience Pays: If you can, resist the urge to hop into a warm bath or shower for about 2 hours. Jumping into warmth too soon can reduce the benefits of your ice bath, no matter your goal. Put off taking that steamy bath for a few hours unless you’re having trouble warming up. However, a warm shower is the best option if you’re still feeling chilly. It’ll have you feeling toasty in no time.
Tips for a Successful Ice Bath Experience
Creating a successful ice bath experience involves more than just filling a tub with icecold water; it requires preparation, understanding, and respect for your body’s reactions to the cold. Here are essential tips to enhance your cold plunging session and ensure you reap the maximum numerous benefits:
- Temperature Matters: Keep your ice bath water between 50-59°F (10-15°C) with the help of a trusty thermometer. Going too cold can be risky while going too warm might dilute the benefits.
- Time Your Soak: Keep your sessions short, under 15 minutes. If you’re new to ice baths, start with even briefer dips, then gradually extend your icy rendezvous to build tolerance.
- Take It Step by Step: Newbie alert! Begin with a gentle partial immersion. Start with your legs or arms and work your way up to the chest. This gradual approach eases your body into the icy embrace.
- Top It Off with a Hat: Your head is a heat-leaking superstar. Keep it cozy by wearing a hat or head covering to minimize heat loss during your frosty escapade.
- Stay Engaged: Battle the chill with distractions. Jam to your favorite tunes, dive into captivating podcasts or lose yourself in an audiobook. Counting or meditation can also divert your mind from the icy embrace.
- Dress for Success: Choose snug clothing that lets you move freely, especially in the water. Keep your extremities toasty with insulated gloves and boots for a comfortable ice bath experience.
- Listen to Your Body: Tune in to your body’s signals while in the ice bath. If you sense anything unusual or feel discomfort, it’s time to reconsider your dip.
- The Cooldown: Post-ice bath, resist the urge to jump into a hot shower. Gradually warm up with a cozy sweatshirt, snuggly blanket, or a warm beverage.
These tips are your key to unlocking an enjoyable and effective ice bath experience. So, don’t fear the cold – embrace it and dive right in!
How Long to Submerge in an Ice Bath?
Determining the optimal duration for submerging in an ice bath is crucial for maximizing benefits while minimizing potential risks. Typically, the recommended time frame for an ice bath ranges from 5 to 15 minutes, depending on individual tolerance, objectives, and experience with cold therapy.
For beginners, starting with shorter sessions of around 5 minutes is advisable to allow the body to adapt to the cold water. Observing how your body reacts during and after the bath is essential; any signs of discomfort or excessive shivering indicate it’s time to exit the bath. As you become more accustomed to the cold, you may gradually extend your immersion time, but it’s rarely necessary to exceed 15 minutes. Prolonged exposure can increase the risk of hypothermia or other cold-related complications.
The timing also depends on what you aim to achieve with your ice bath. For example, athletes focusing on workout recovery may find that 10 to 15 minutes post-exercise helps alleviate muscle soreness effectively. In contrast, those using ice baths for mental clarity or alertness might find shorter immersions sufficient.
Always use a timer to monitor your session and avoid overstaying in the icecold water. Listening to your body’s signals is paramount; if you start feeling numb or overly uncomfortable, it’s time to end the session regardless of the elapsed time. Balancing the numerous benefits of cold plunging with safety and personal comfort ensures an effective and sustainable practice.
Unpacking the Drawbacks of At-Home Ice Baths
While at-home ice baths offer many advantages, including convenience and accessibility, they come with potential drawbacks that should be considered. Understanding these can help you navigate and mitigate any negative aspects, ensuring a balanced and informed approach to cold therapy.
- Inconvenience: Let’s be honest. Setting up an ice bath daily or even consistently can be a bit of a chore. It’s not the most thrilling part of your routine.
- Temperature Troubles: Fine-tuning the temperature to your liking is a challenge when you lack manual control.
- Time Sink: The setup process can eat up a chunk of your precious time, and afterward, you might find yourself with a bit of a chilly mess to tidy up.
- Ice Quest: Get ready for those frequent grocery store trips to keep your ice supply stocked.
But fear not; if you’re in search of a simpler, hassle-free way to integrate ice baths into your life, an exciting alternative awaits. The Cold Plunge provides a user-friendly experience that allows you to customize the temperature, use it indoors or out, and revel in easy setup and cleanup. It’s a convenient solution designed to elevate your ice bath adventure while conserving your time and energy during each session. You can learn more about the drawbacks or risks of Ice baths.
Conclusion
Concluding our comprehensive guide to ice baths, it’s evident that this form of cold therapy offers a range of benefits, from enhanced workout recovery and reduced muscle soreness to improved mental clarity and stress resilience. Whether you’re an athlete looking to optimize performance or someone seeking natural ways to boost well-being, ice baths can be a valuable addition to your wellness regimen.
However, as with any health and wellness practice, it’s crucial to approach ice baths with mindfulness and respect for your body’s signals. Adhering to recommended durations, temperatures, and safety precautions ensures that you gain the maximum numerous benefits without compromising your health. Remember, individual experiences with cold therapy can vary, and what works for one person may not work for another. Listening to your body and adjusting your approach accordingly is key to a successful and sustainable ice bath practice.
For those considering at-home ice baths, understanding both the potential benefits and drawbacks is essential. While cold plunging at home offers convenience and accessibility, ensuring proper technique, safety, and aftercare is vital. Consulting with healthcare professionals, especially if you have preexisting conditions, further ensures that your ice bath experience is both safe and effective.
In summary, ice baths represent a holistic tool that can contribute significantly to physical recovery, mental health, and overall well-being. By incorporating this ancient yet enduring practice into your routine with care and consideration, you can tap into the cold water’s revitalizing power, embracing a journey of resilience, recovery, and rejuvenation.