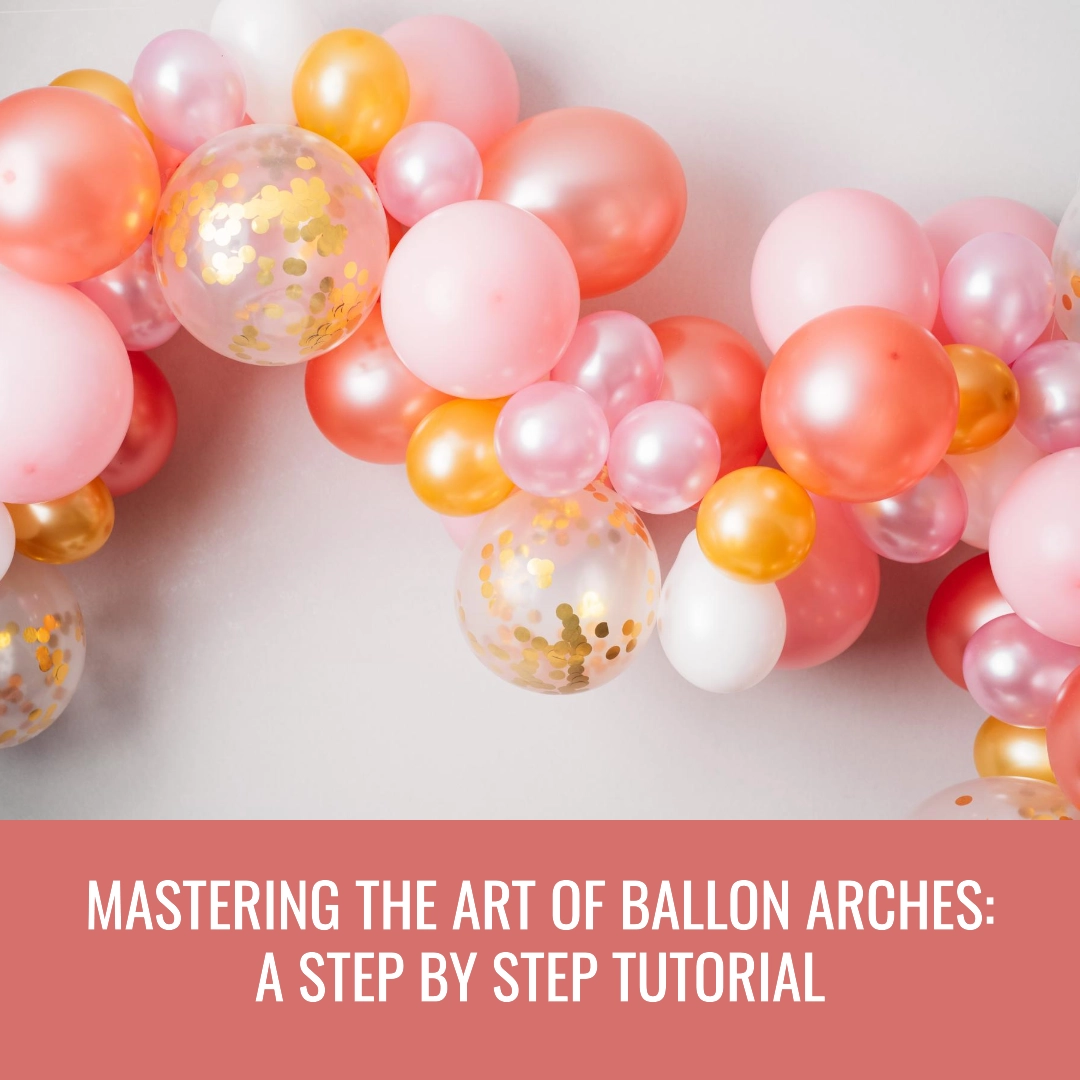
Are you ready to take your party decorations to the next level? If so, then mastering the art of balloon arches is a must. Balloon arches are a fun and eye-catching way to create a festive atmosphere at any event, whether it’s a birthday party, a wedding, or a corporate gathering. In this step-by-step tutorial, we will guide you through the process of creating stunning balloon arches that will impress your guests and make your event truly unforgettable.
From choosing the right balloons to creating a sturdy base and arranging them into a beautiful arch, we will provide you with all the tips and tricks you need to know. Whether you’re a DIY enthusiast or a professional event planner, this tutorial will help you master the art of balloon arches and create breathtaking designs that will wow everyone.
So, gather your balloons, inflate your creativity, and get ready to become a balloon arch pro. Let’s dive into this step-by-step tutorial and take your party decorations to new heights.

Benefits of using balloon arches
Balloon arches offer a multitude of benefits when it comes to party decorations. First and foremost, they instantly grab attention and create a wow factor. The colorful balloons arranged in an arch shape make a bold statement and set the mood for any event. Whether you’re hosting a small gathering or a large-scale celebration, a balloon arch will undoubtedly leave a lasting impression on your guests.
Moreover, balloon arches are incredibly versatile. They can be customized to fit any theme or color scheme, making them suitable for all types of events. Whether you’re going for an elegant and sophisticated look or a fun and playful vibe, a balloon arch can be tailored to match your vision.
Another advantage of balloon arches is their cost-effectiveness. Compared to other elaborate decorations, balloon arches are relatively affordable, especially if you opt for a DIY approach. With just a few materials and some creativity, you can create a stunning balloon arch without breaking the bank.
Overall, balloon arches are the perfect addition to any party or event. They are visually appealing, versatile, and budget-friendly. Now that you know the benefits, let’s move on to the materials you’ll need to create your own balloon arch.
How to make a Balloon Arch in easy steps?
Creating a balloon arch may seem like a complex task reserved for professional decorators, but I’m here to show you it’s not only possible but also enjoyable to do it yourself. This section will guide you through the simple yet effective process to assemble your very own balloon arches with minimal hassle. By adhering to our easy balloon arch assembly guidelines, you’ll transform any space into a celebratory spectacle.
First and foremost, ensure you have your balloon arch kit ready. These kits are a godsend for beginners and include nearly all you need, from balloon clips to garland tape. Starting with the basics, select balloons that complement your event’s theme. Using a variety of balloon colors and sizes not only adds depth and texture to your arch but also personalizes your decoration, making it unique to your celebration.
Moving on to the assembly, the process of creating your arch should be methodical and patient. Begin by inflating your balloons, taking care not to overinflate them to avoid popping. This is where DIY balloon garland techniques come into play; by alternating colors and sizes, you create a more dynamic and visually appealing structure. Once your balloons are ready, attach them to the balloon tape or string, depending on your chosen method, ensuring they are tightly secured.
For those worried about the time commitment, fret not. The no-hassle balloon arch creation ensures that even the busiest individuals can create a stunning piece. Plus, the satisfaction of crafting your balloon arch from scratch is unmatched. Remember, the goal here is not perfection but creation. Embrace the irregularities and let them add character to your arch.
Lastly, remember that making a balloon arch is more than just following steps; it’s about creating an experience. With each balloon you tie, you’re not only building a structure but also constructing an ambiance, one that will contribute significantly to the joy and memories of your event. So, grab your balloon arch kit and let’s dive into the world of DIY balloon structures, crafting an unforgettable backdrop for your special occasion.
DIY Balloon Arch materials
Diving into the world of DIY balloon arches requires not just creativity and patience but also the right materials. Before you start crafting your masterpiece, assembling all the necessary essential DIY balloon supplies is crucial. This section will guide you through the materials you need, ensuring you’re well-prepared to begin your balloon arch journey.
- Balloons- Pick and choose different colors of balloons and try to match them with your desired design.
- Balloon pumps- You can use balloon pumps. Though it’s not mandatory if the party decoration is big and you have to make several arches, then you better use a pump machine so as not to cause stress to your lungs. Both handheld and electric balloon pumps- anyone can use them.
- Fishing line- I have already told you about it above. A fishing line serves as a frame to your balloon arch. It won’t be visible once the balloons are assembled on the line.
- Blunt needles- A blunt needle is necessary to string all the balloons. Using a needle, you can save your fingers from pricking.
- Low-temperature glue gun- It is needed to attach extra balloons to the arch.
- Fresh flowers and foliage- If you want a natural touch of floral freshness to your party.
- Hooks- Hooks can be sticky or metal with a hammer and nails. Hooks and nails depend on the place where you want to hang the prepared arch.
- Scissors- Cutting with scissors is an unavoidable thing in any work, so making a balloon arch is the same. You need a pair of scissors to cut the fishing line and hang your arch.
- Balloon tape- shipping tape will help you to fix anything if it has been slipped from its right place.
Note: You don’t need to use both fishing line and clear tape. You can use any one of them according to the method you’re using in the making of your arch.
Materials Required
If you want to make an arch frame yourself (DIY), then you also need some materials that are given below-
- 2 pieces of plywood that are ¾ inch thick and 24 x 24 inch wide.
- 2 pieces of floor flanges that are ¾ inch thick.
- 8 plywood screws.
- 8 washers
- 2 pieces of metal pipes that are ¾ x 8 inches.
- 2 pieces of electric conduits (EMT) pre-cut that are ½ inches in 2 feet long sections.
- 3 pieces of grey PVC pipe
- Duct tape
How to make a Balloon Arch?
Crafting a balloon arch from scratch might sound intimidating, but it’s a rewarding DIY project that can be tackled with some patience and creativity. In this section, we’ll walk through the foundational steps to create your very own balloon arch, ensuring it’s not only beautiful but also stable and tailored to your event’s theme.
Project time: 1-2 hours
Step-1: Sketch your design
Gather all the materials in one place and sketch a design that you want to give your arch. If you have a general idea about the shape of your arch, then it’s enough, and you don’t need to be an expert on it.
Pro tip
You don’t necessarily need to create a traditional arch. Be whimsical and funny about this matter. For example, you can create an incomplete arch or a garland that is climbing the wall.
Step 2: Blow up Balloons
Now blow up balloons. You may choose any shape, but the small size looks cute and is very much eligible for balloon arches. You can choose a particular color for every cluster and assemble those for an eye-catching look.
Doing this, you can use your breathing system if you want; otherwise, you better use a pump machine that can be handheld or electrical. If you want to lower your work pressure, then an electrical work pressure, and also, if you have to make several arches, then a pumping machine is better.
Pro tip
Blow up some balloons in small sizes so that you can fill up the gaps in the blank spaces after putting up the larger balloons.
Step 3: Tie the fishing line at the end of your needle
Use a traditional knot and the end of a needle to tie the fishing line. According to the size of the fishing line, you may need to make several knots to make it safe and secure.
Pro tip
You can use more advanced knot-tying techniques if you’re not so expert in sewing craft. By using these advanced techniques, you can be more sure that you’re in the right line and it isn’t going anywhere.
Step 4: Thread your needle through the knot of an inflated balloon
Now, it’s time to thread the needle through the knot of an inflated balloon. Here, you have to be careful so that your finger doesn’t get prickled during the threading. Keep your fingers on any one side of the knot and carefully push the needle.
Pro tip
Here, you can use a thimble so that the knot of the balloons can become thicker than you guess. A thimble helps you to push the needle more, avoiding any injury.
Step 5: Slide Balloons down the line
Slide all threaded balloons down the line one by one. Now cut the end of the fishing line and make a knot so that any ballon can’t drop out of the fishing line.
Pro tip
You may maintain a variation of the balloons according to size and color.
Step 6: Cut the end of the fishing line
Cut the fishing line at the very end of the line and tie a knot after cutting this so that the balloon doesn’t fall off and stays in the right place. Here, you can use the same advanced techniques as you used in Step 3.
Pro tip
If necessary, you should check the Ballon Arch for the second time to ensure that it’s going to the right size because if you cut the fishing line once, you can’t make any corrections.
Step 7: Place hooks on the wall
To put the arch up, you need to lay out the frame and put the arch. Attach it to the wall or the hanging area with the help of hooks or nails. You have to hang the hooks or nails according to your desired shape.
Pro tip
After putting the arch up in sections, you need to keep a free space to attach it to a hook or nail. When you attach a section, move balloons back closer to make a full space. It’ll continue to keep free spaces for the next section to make the hanging easy.
Step 8: Fill the gaps with Balloons
Use the low-temperature glue gun to fill the holes with small balloons. It’ll make a different look on the arch. When you use the glue gun, never touch the tip; otherwise, it may pop out and hurt your fingers.
Pro tip
To add a drop of adhesive, you need to hover the glue gun above the Balloons.
Step-9: Add fresh flowers and foliage to finish off the Balloon Arch
Fresh flowers and foliage will give a natural look and fragrance at the party. You also can choose other options to increase the beauty of your Balloon Arch according to the theme of the party.
Pro tip
If you’re hosting a summer-themed celebration, then fresh flowers and palm fronds will be the best option. If you’re hosting your kid’s birthday party, then you can decorate with balloon animals. To learn how to make balloon animals, you can read my other article.
Tips and tricks for balloon arches
Creating balloon arches can be a fun and rewarding project, but knowing some insider tips and tricks can transform the experience from good to great. Whether you’re a first-timer or looking to refine your skills, these pieces of advice are designed to enhance the quality and appearance of your balloon decorations.
Now, you need to follow some general tips and tricks for all our balloon arches. These tips and tricks will make your work easier. The tips that are given below are both universal and only for the methods mentioned in this article.
- Never overfill the balloons. Always maintain a medium size, and for filling the gaps, small-sized balloons are ideal. Always maintain a smooth, circular, and soft shape. If the balloons are overfilled, then they may pop out.
- The size of balloons will remain the same and never make an uneven size. If there is no similarity in the size, it’ll be odd-looking.
- If you’re using an electric pump machine, it’s very normal that the balloons may become oversized. In that case, just release your fingers to let the excess air go.
- Keep large balloons and small balloons separately as needed.
- If your balloon arch has different sizes of balloons, then stack them according to their size.
Finally, remember that balloon decorations are not just about following a formula; they’re about expressing creativity and joy. While it’s important to follow basic guidelines and techniques, don’t be afraid to experiment with balloon colors, patterns, and layouts. Each arch is unique, and personal touches will make your creation stand out.
In summary, constructing a balloon arch is more than just tying balloons together; it’s an art form that benefits from practice, patience, and a willingness to learn. By applying these tips and tricks for balloon arches, you’re not only enhancing the visual appeal of your decorations but also ensuring a smoother and more enjoyable building process.
How to choose the best balloon arch?
Selecting the best balloon arch for your event involves more than just picking colors; it requires an understanding of the event’s theme, location, and the message you want to convey. This section is dedicated to guiding you through the process of choosing the most suitable balloon arch that not only complements your event but also stands as a testament to your attention to detail and creativity.
Firstly, assess the scale and scope of your event. The size and design of your balloon arch should correspond with the space it’s intended to fill. An oversized arch might overwhelm a small room, while a too-modest arrangement could get lost in a vast space. Balance is key, and this is where knowing your balloon sizes and potential balloon arch prices becomes invaluable. A larger, more elaborate setup will generally require a bigger investment, so align your choices with your budget without compromising the quality of your decoration.
Next, consider the color scheme of your event. Balloon colors play a pivotal role in setting the mood and matching the event’s theme. Whether you opt for vibrant gold balloons, serene pastel balloon arches, or themed cactusthemed balloon arch, ensure your choice enhances the overall aesthetic and atmosphere. Utilizing popular posts and engagement rings as sources of inspiration can offer creative ideas and trends that can be tailored to your specific needs.
The material and quality of the balloons also merit consideration. Premium decoratorquality balloons, such as Qualatex balloons, offer a wider range of colors, sizes, and durability, ensuring your arch remains intact and vibrant throughout the event. While it might be tempting to cut costs, investing in high-quality materials can significantly impact the arch’s appearance and longevity.
In conclusion, choosing the best balloon arch involves a careful balance of practical considerations and creative expression. By factoring in the size, color, quality, and thematic elements, you can select an arch that not only beautifies your space but also enhances the event’s overall impact. Remember, the best arch is one that resonates with you and your guests, creating lasting memories and a stunning backdrop for your special occasion.
How to make a balloon arch with a string?
Creating a balloon arch with a string is a popular method due to its simplicity and the elegance it can bring to any event. This technique is particularly suited for those looking to craft a more linear or free-form structure, providing flexibility in design and placement. Let’s dive into the essentials of constructing a string-based balloon arch that captivates and delights.
Firstly, selecting the right materials is crucial. You’ll need a durable string, preferably a fishing line for its strength and invisibility, complemented by a selection of string balloons tailored to your event’s color scheme and theme. The beauty of using string is the control it offers; you can adjust the tightness and spacing of the balloons to create various shapes and designs.
The construction process begins with inflating your balloons to the desired sizes. It’s beneficial to have a mix, as this variation adds depth and interest to the arch. Once inflated, tie the ends of the balloons and start attaching them to the string. For this, you might use the knotting method, where you tie the balloon’s end directly onto the string, or employ balloon clips for easier attachment and adjustment.
Let’s have a look at both methods.
Materials Needed
You need the materials and supplies for making a balloon arch string, and you need these for both methods. Those are-
- Balloons
- Ballon pump machine (handheld or electrical)
- Fishing line
- Hooks to hang the balloon arch
- Large and blunt needle (not mandatory, but if you want, you can use it.)
After gathering all the necessary materials, you can kick start.
- As usual, you need to blow up all the balloons. You can blow up every single balloon separately and tie their ends, or you can also blow up 2 balloons together and knot their ends together.
- If you tie each balloon separately, then stringing them by using a needle and a fishing line will be the best for you. In that case, go to No.3, but if you tied 2 balloons together, then No.3- No.5 aren’t needed to follow and skip to No. 6 directly.
- Anyway, always take a long piece of the fishing line because you can cut the exceeded portion if you need but you can’t make it big at all.
- Now you need to secure the fishing line to the needle by making a knot and poking the end of the needle through the balloon knot. This portion should be the exceeded portion of the balloon knot. So, there is no chance to pop out. The end of the fishing line is secured to the balloon knot so it won’t get loose and fall off.
- String the rest of the balloons. If there are different colors and sizes of balloons in the arch, then string them with creativity so that you can create a dynamic balloon garland. Now skip to No.9.
- I told you above that if you tied 2 balloons together, then go to No.6. So I’ll continue the rest now. Start connecting the balloon ends together. Take the balloon pairs one by one and make ties of the string with the end of the balloon pairs. The string should be attached securely.
- Now, take the next balloon pair and lay it on a 90-degree angle. Now, take the string and wrap it around the base of the top 2 balloon pair. Similarly, around the base of the bottom 2 balloons. At the end, take the string back on the top. You’ll repeat the process each time until the wrapping ends.
- Continue and make a structure of Figure 8, adding new balloons. Always lay one pair of balloons on the top layer and one pair underneath the string.
- When all balloons are secured to the finishing line, make a secure knot and tie it off. A loop with the ending fishing line will help hang the balloon arch. So, make and add small fishing line loops throughout the balloon arch garland.
Now you better know how to make a balloon arch with a string. It is ready now, and you can hang it without a stand. To know about the method more clearly, please watch the short and very useful video tutorial.
Balloon arch without string or stand
If you like neither a balloon arch with a stand nor with fishing wire or string, then you can apply the third method, which is- a balloon arch without a stand. In this method, you can use balloon tape, and it’s probably the easiest method.
Balloon tape is used with little holes along with a plastic strand. You can cut the strand according to the length of the balloon arch. You just need to leave more open gaps between the balloons so that you can fill the gap later with smaller balloons.
The material used for this method is glue dots. The rest of the materials are-
- Balloons
- Ballon pump (electric or handheld)
- Balloon tape
- Glue dots
- Fishing line (If you want to hang by this.)
- Hooks
By following the simple steps, you can make a nice balloon arch without string. Those are-
Creating a balloon arch with a string is a popular and straightforward method that adds elegance and fun to any event. This technique is particularly handy for those seeking a more flexible and less structured approach compared to traditional methods. Here, I’ll guide you through the process of constructing a captivating string balloon arch, step by step.
First, gather all necessary materials, which include a variety of balloons, a balloon pump, and a durable fishing line or string. The key to a successful string arch is the quality and variety of your balloons. Mix different balloon colors and sizes for a dynamic and textured look. String balloons together in a way that complements the event’s theme, utilizing colors and arrangements that match your decor.
Begin by inflating your balloons, keeping consistency in size for a uniform look, yet varying the colors according to your planned design. Once your balloons are inflated, start creating clusters by tying the ends of four balloons together. This clustering method adds volume and strength to your arch.
Now, tie one end of your fishing line to a fixed point or weight, ensuring it’s secure and taut. Gradually thread the balloon clusters onto the string, pushing them down to the fixed end, and arrange them closely together to avoid gaps. For a crafting string balloon arch, precision in spacing and symmetry is vital. Adjust the balloons as needed to achieve your desired shape and fullness.
As you progress, periodically step back to assess the overall shape and density of your arch. The beauty of a string-based balloon setup lies in its adaptability; you can easily adjust the length and curve by adding or removing balloon clusters. This flexibility makes the balloon arches using string method particularly appealing for DIY enthusiasts.
In conclusion, creating a balloon arch with a string is a rewarding DIY project that can be customized to fit any occasion. By following these steps and incorporating your personal touch, you’ll craft a stunning focal point that elevates the atmosphere of your event. Remember, the most important ingredients are patience, creativity, and fun!
What are the types of balloon arches?
When planning your event’s decor, understanding the different types of balloon arches available can greatly influence the ambiance and aesthetic of your celebration. Each type brings its unique flair and suitability depending on the event’s theme, location, and purpose. Let’s explore some popular styles that could elevate your next gathering.
There are 3 types of balloon arches such as
- Do It Yourself (DIY) balloon arch
DIY methods are for budget-conscious people. If you want to make a balloon arch without breaking the bank, then DIY is the best for you. A DIY kit usually comes with all the necessary things you need to make a balloon arch.
- Pre-made balloon arch
If you don’t care about the budget and also don’t have the time and patience to make balloon arches, then you can order pre-made arches. Professional home decorators make these types of arches, and they are available in stores and online stores.
- Organic balloon arch
An organic balloon arch is also a good option if you arrange a bohemian-typed whimsical event. This type is also trendy and unique. Organic balloon arches are available in different shapes and sizes.
What are the basic balloon arch methods?
Understanding the basic balloon arch methods is essential for anyone looking to delve into the art of balloon decor. These foundational techniques provide the framework for creating various styles and designs, enabling you to construct stunning visual displays for any occasion. Let’s break down some of the fundamental approaches to building balloon arches, which can be tailored to fit any event’s theme and scale.
The first and most common method involves using a metal or PVC frame as the structure’s backbone. This approach offers stability and precision, allowing for a wide range of sizes and shapes. By attaching balloon clusters or garland tape to the frame, you can create a traditional arch or even venture into more intricate designs like spirals or waves. This method is particularly suitable for large or outdoor events where durability is key.
Another popular technique is the string or fishing line method, which provides more flexibility and is often used for indoor events or lighter displays. In this approach, balloons are tied directly to a clear line, allowing them to float freely and form a natural arch shape. This method is ideal for creating balloon garlands or softer, more organic-looking arches.
For decorators seeking a more contemporary and less structured look, the balloon tape method is increasingly popular. This involves securing inflated balloons to a strip of adhesive balloon tape, which can then be shaped and mounted to walls or hung from ceilings. This method eliminates the need for heavy frames or stands, offering a cleaner aesthetic that’s particularly effective for indoor venues.
Lastly, the air-filled balloon arch is a cost-effective and helium-free option. Using a base of water weights or sandbags, this method relies on air-filled balloons, which are attached to a structured frame or molded into shape using balloon tape or string. While this method may require more balloons due to the lack of helium lift, it is environmentally friendly and perfect for longer events, as air-filled balloons tend to last longer than their helium counterparts.
How many balloons does it take to make this balloon arch?
A common question among party planners and DIY enthusiasts is, “How many balloons does it take to make this balloon arch?” The answer varies based on the size and density of the arch, as well as the size of the balloons used. However, understanding a general formula can help you estimate the number needed and plan your decoration effectively.
For a standard-sized arch (about 24 feet in length), you might need around 200 to 250 standard-sized (11-inch) balloons. If you’re using smaller balloons (5 to 9 inches), the number increases, as you’ll need more balloons to cover the same amount of space and create a full, lush look.
The calculation goes like this: measure the length of the desired arch and multiply by the density factor, which is how many balloons you’d need per foot or meter based on their size. For example, for a dense arch, you might use 12 small (5-inch) balloons per foot or 8 medium (9-inch) balloons per foot. This gives you a starting point for purchasing the correct balloon quantity.
Keep in mind that several factors can affect this number, including the arch’s design (single row vs. clustered), whether the arch is filled with airfilled balloons or heliumfilled balloons, and the actual size of your arch. A good practice is to buy extra balloons to account for any that may pop during assembly or to fill in gaps for a fuller appearance.
In essence, while there’s no one-size-fits-all answer to “How many balloons does it take to make this balloon arch?”, having a basic understanding of these calculations can significantly ease the planning process. Remember, it’s always better to have a few balloons left over than to run short in the middle of decorating.
How many balloons are needed for a single row or garland?
For a single or garland, you’ll need almost 3 x 11 inches per meter, or in another language, you can say 0.91 x 11 inches balloons per foot. For example, if your arch is 20 meters long (according to Figure 3), then you need a 60 x 11-inch balloon (20 meters x 3 balloons per meter).
How many balloons are needed for a clustered arch or garland?
If you’re measuring the length of the arch or garland and the diameter of balloons in the same unit, both are being measured by either foot or meter. You can use this formula with a cluster of 4 balloons.
Now divide the diameter of the balloons by the length and multiply by 4.8. By this method, you’ll get the right number of balloons you need.
For example, you are making an arch that has a height of 37 meters or 12 feet and a width of 6.1 meters or 20 feet as you’re applying the Figure-1 formula, which means the width of your arch is more than the height. Let’s use the same unit, which means let’s calculate everything by meter/Centimeter.
The length of the arch is 610 cm+ 370 cm= 980 cm.
Number of balloons- 980 cm/ 28 cm x 4.8= 168 balloons.
Number of the cluster of 4 balloons= 168/4= 42.
You can use an easier process by the unit of foot/ inch.
5-inch balloons at 12 per foot
9-inch balloons at 8 per foot
11-inch balloons at 6 per foot
14-inch and 16-inch balloons at 4 per foot
Here, you need to remember that you have to take a 4-ballon cluster each. The above calculation won’t be clear to you; it’s just a one-time reading. So, don’t panic and take your time. Read and understand the calculator several times.
Now you have the full details about ‘Mastering the Art of Ballon Arches: A step-by-step tutorial.’ By reading this tutorial and watching recommended videos, you can learn the process and become a master of the art of balloon arches. If you want to know more about the topic, you can read my other article. So, go ahead.
Conclusion
As we wrap up this comprehensive guide on Mastering the Art of Balloon Arches, it’s clear that creating a stunning balloon arch is more than just an act of decoration; it’s a form of art that adds vibrancy, color, and life to any event. From the simplicity of stringing balloons together to the intricacy of designing a themed spectacle, balloon arches offer a unique way to enhance the ambiance of celebrations, leaving lasting impressions on guests.
Throughout this tutorial, we’ve covered various aspects of balloon arch construction — from selecting the right materials and understanding the different types to mastering basic assembly methods. We’ve also touched on the importance of choosing the right type for your event, whether it’s an elegant pastel balloon arch for a wedding or a fun bright balloon arch for a birthday party.
The versatility and visual appeal of balloon arches make them a favorite for event planners and DIY enthusiasts alike. Whether you’re a first-timer or an experienced decorator, the tips and techniques shared here should equip you with the knowledge to create your own breathtaking balloon displays. Remember, the key to a successful balloon arch lies in careful planning, creativity, and patience.
Finally, I encourage you to experiment with different balloon colors, sizes, and arrangements to discover what works best for your specific event. Each balloon arch is a reflection of the creator’s style and the event’s character, so don’t be afraid to add your personal touch. And most importantly, have fun with it! The process of creating a balloon arch can be just as enjoyable as the final result.
In conclusion, balloon arches are a dynamic and delightful way to add a special touch to any celebration. Armed with the knowledge from this ultimate guide, you’re now ready to tackle your next event with confidence and creativity. So, inflate those balloons, arrange them with care, and watch as your festive vision comes to life.